Add an asset
This article shows you how to add an asset to your model in the Editor.
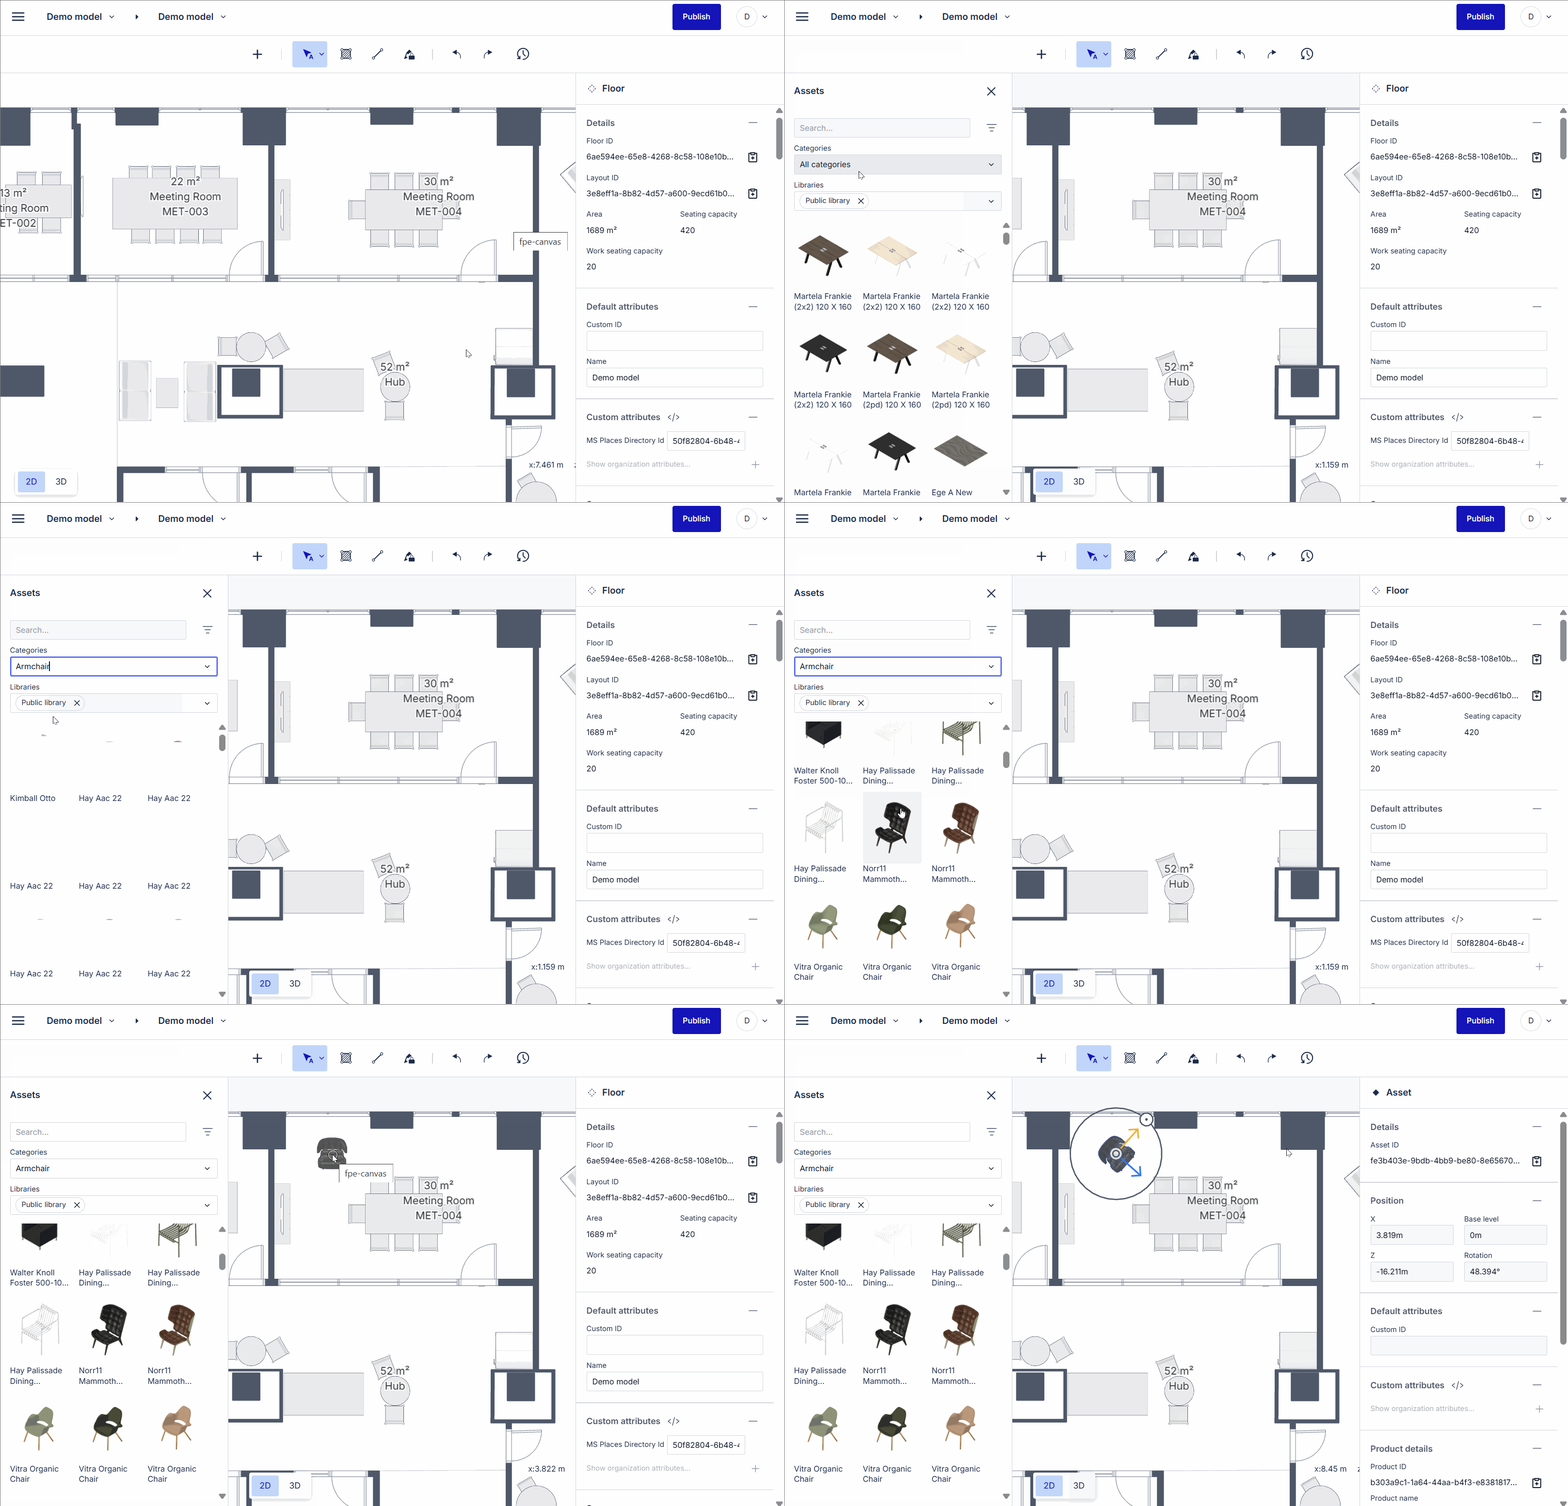
In the editor, open the asset library panel by left-clicking the plus icon in the toolbar.
With the asset library panel open, use the search bar or the Categories drop-down menu and advanced filter to find specific assets that match your criteria, such as color, dimension, and more.

Once you've found the asset you want to add to your floor plan model, simply drag and drop the object thumbnail icon from the menu onto the 2D canvas view. The asset is now added to the canvas. You can move or rotate it to the location of your choice.
You can also try our AI-powered Auto layout feature to furnish a space with a set of generic assets automatically.
Changes are autosaved in the Editor, but don't forget to publish your model when you are ready to make the changes public.
Place an interior asset on top of another asset
To place an interior asset, such as a laptop, on top of another interior asset, such as a table, you first have to switch into the 3D view mode by clicking the 3D button in the lower left corner of the editor canvas.

Once you’ve switched to the 3D view mode, simply drag an interior asset from the library and drop it on another interior asset, such as a table. This will place the asset on top of the other one.

After you’ve placed the interior asset on top of another one, return to the 2D view mode by clicking the 2D view button in the lower left corner of the editor canvas to fine-tune its rotation and position.

Be advised that dropping interior assets on top of other interior assets only works in the 3D view mode. If you drop an interior asset on top of another interior asset in the 2D view mode, it will be placed on the ground instead, and you will have to manually adjust the vertical position of said asset.
