Assign a custom ID to objects
You can assign custom IDs to all objects (such as doors, walls, windows, chairs, etc.) within an Archilogic model.
To assign a Custom ID to an object, you must first open the model containing the object in the Archilogic editor.
In the editor, make sure the 2D view mode is active by clicking the 2D button in the lower left-hand corner of the window.
Then, select the object to which you wish to add a custom ID by left-clicking it.
In the inspector panel on the right side of the window, you'll find a textbox labeled:
Custom ID.
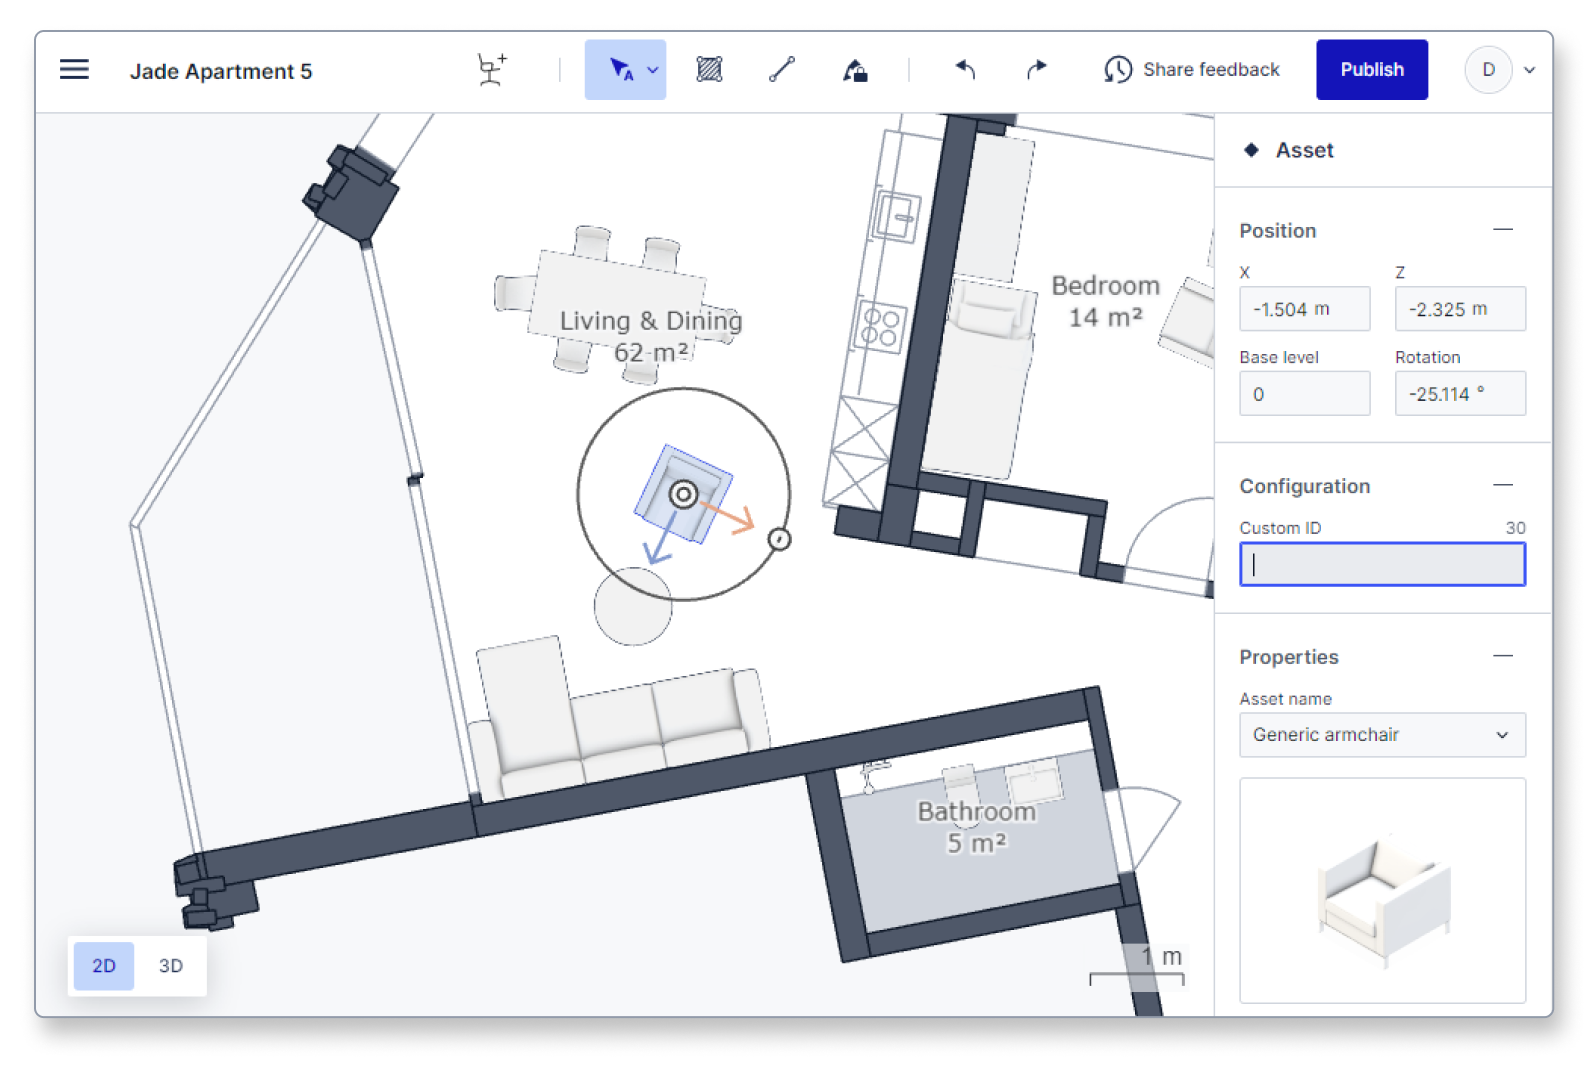
Type in a custom ID and you’re done.
Make sure to publish your changes before sharing the model with someone else.
Assign a custom ID or name to a space
Custom IDs can also be assigned to entire spaces. Other than single objects, spaces can also receive a name and directly display these two values on the 2D floor plan.
To make these values visible in the 2D floor plan view, you have to enable both options through the organization settings first.
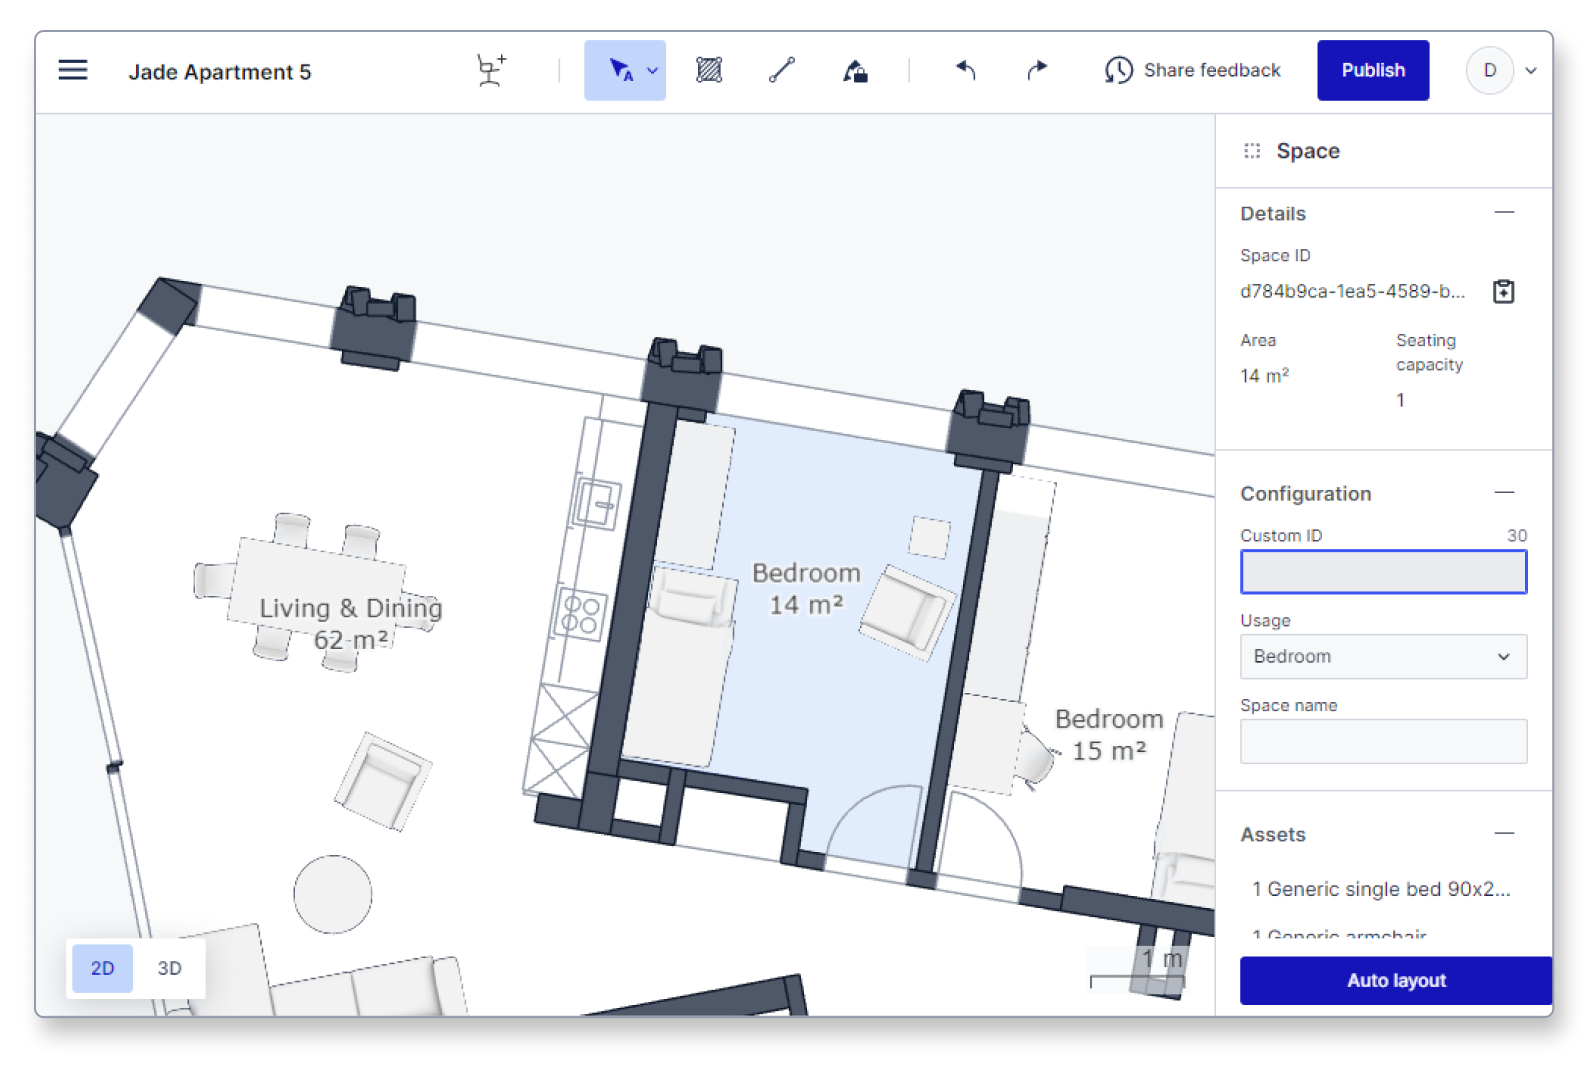
Then, in the editor, select the room to which you want to assign a custom name or ID by left-clicking it.
In the inspector panel on the right side of the window, you'll find two text boxes for "Space name" and "Custom ID". Type in a custom name and ID, and they will show up on the 2D floor plan.
Changes are autosaved in the Editor, but don't forget to publish your floor plan model when you are ready to share it publicly.