A railing is a fence or barrier made of rails. It's part of the structural elements in an Archilogic floor plan model.
To add or adjust a railing in the Editor, you must first unlock structural editing mode.
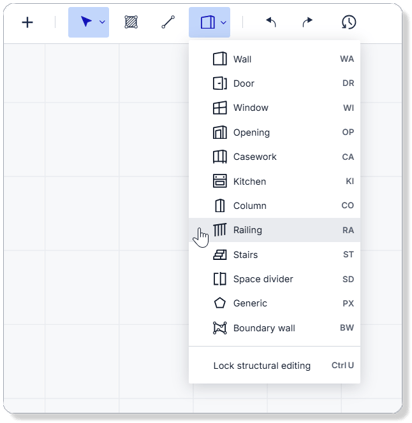
To draw a railing in the Editor, switch to the 2D view, and open the drawing drop-down menu by left-clicking the structural editing button in the tool panel bar at the top of the window.
Then select the railing drawing tool. You can also type the keyboard shortcut RA on Mac or Windows to activate it.
Start drawing a railing by moving the mouse cursor to the starting position. Then left-click to start drawing the railing object. Move the mouse cursor to the ending position and left-click again to stop drawing the railing object.

To further customize the railing, simply select it by left-clicking the railing. You can now adjust the properties of the railing in the Inspector panel:

1. Details
In the details section, you can find the unique ID of the railing object. You can't edit the ID, but you can copy it to, for example, access the railing object through the API.
2. Position
The X position controls the side-to-side movement across the canvas.
The Z position controls the front-to-back movement across the canvas.
The Base level controls the elevation of where the bottom of the railing sits.
The Rotation controls the angle of the railing.
3. Dimensions
The Height controls how high the railing is.
The Width controls how wide the railing is.
The Length controls how long the railing is.
4. Default attributes
In the default attributes section, you can assign a custom ID to the railing object if necessary.
5. Segments
In the segments section, you can adjust the segmentation of the railing.
- If Count is selected, you can control how many segments the railing has. If the value is 0, then the segmentation is handled automatically.
- If Length is selected, you can control the distance between each segment. If the value is 0, then the segmentation is handled automatically.
4. Materials
You can assign a custom color value to the railing. To do so, simply click the input field and type in a hexadecimal color value or click the swatch box on the left of the input field to pick a color.
Changes are autosaved in the Editor, but don't forget to publish your model when you are ready to make the changes public.