Please note that this feature is only available with Archilogic Pro subscriptions or higher. If you're interested in this feature please reach out to one of our solutions experts.
To customize the space usage labels you have to first have to make sure that you’re logged into your Archilogic account.
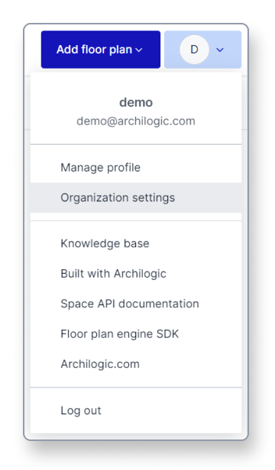
Once signed in, click the round button at the upper right-hand corner of the window and select Organization settings.
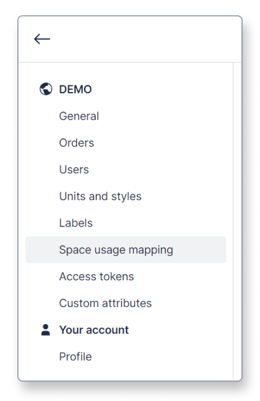
In the Organization settings select Space usage mapping from the menu on the left side of the window.
 The Space usage mapping menu allows you to map custom labels to the various space usages. These new labels will then replace the description in the 2D view of all models in your account.
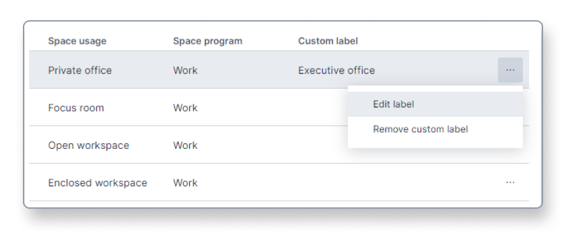
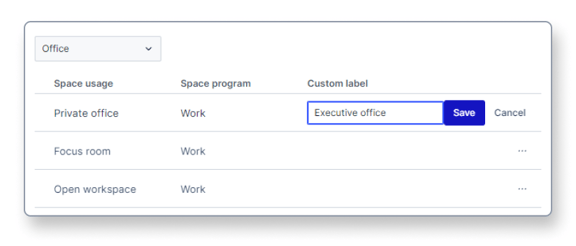
You can for example create a new custom label called “Executive office” that is mapped to the default space usage label “Private office”.
All spaces of your Archilogic models that were assigned the “Private office” usage will now show the custom label “Executive office” instead.
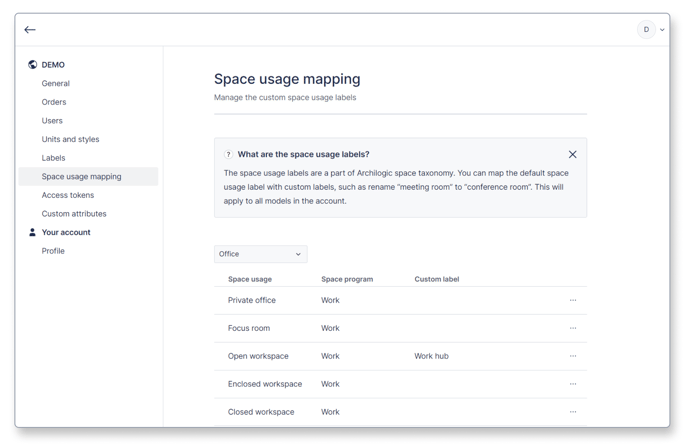
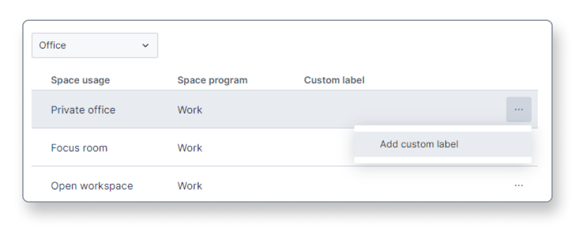
The drop-down menu above the list allows you to switch between the three different usage categories such as:
- Residential
- Office
- Parking
To create a custom label left-click the button with the three dots for the space usage that you wish to adjust. Then select Add custom label.
You can then type a new term for the custom label. Click the blue Save button to confirm your changes.
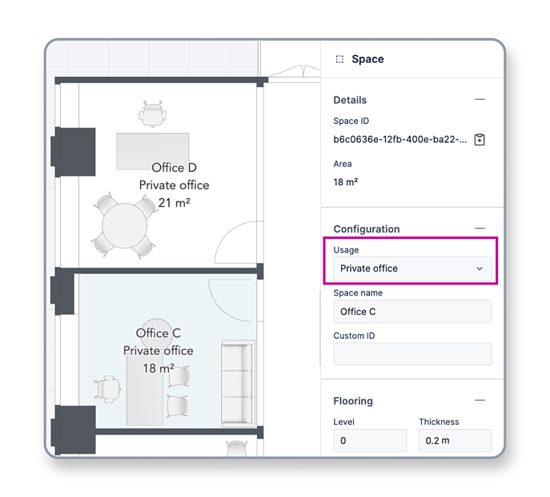
The new custom space usage label is now shown in all of your Archilogic models in the 2D Floor plan view mode and can also be selected from the usage drop-down menu in the 2D mode of the editor.
To edit or remove a custom label simply click the button with the three dots again and select either Edit label to give it a new name or Remove custom label to remove the label from the list and return all models to using the default space usage label.