
Drawing a column
To draw a column, you have to first open an Archilogic floor plan in the editor.
Make sure to unlock structural editing before continuing.
Then, open the drawing dropdown menu and select the column drawing tool
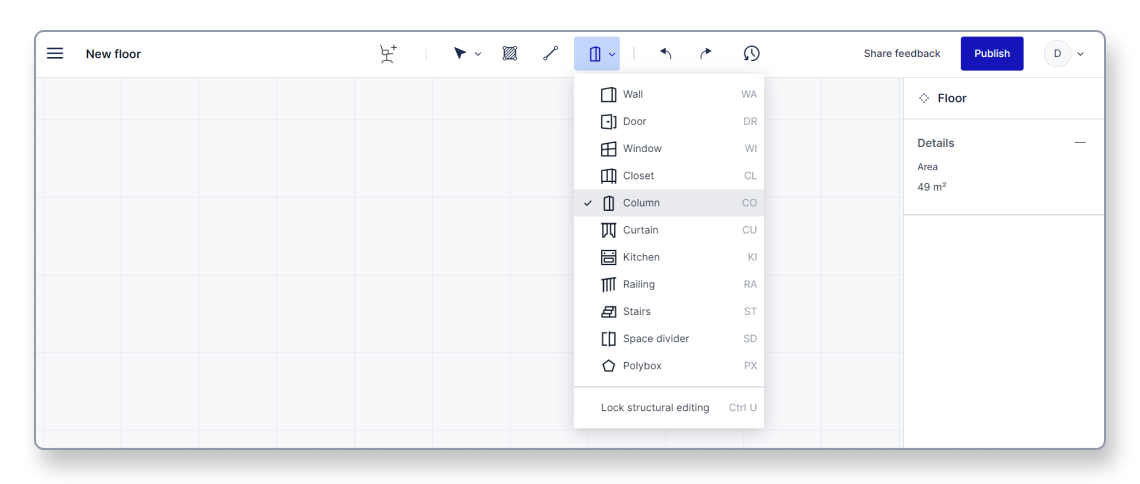
Alternatively, you can also select the column drawing tool by using the CO keyboard shortcut.
Start drawing a column by left-clicking into the scene and moving your mouse cursor.
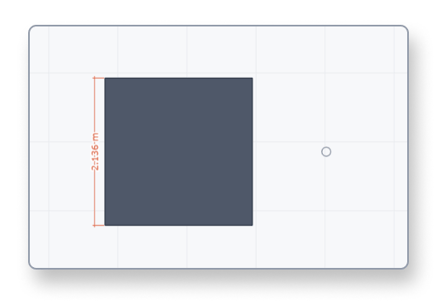
Press the Shift key once if you want to snap the column to one of the two axes.
Left-click again to set the size of the column. Don't worry if you didn't manage to get the measurements 100% correct, as you can still adjust them afterward.
Adjusting the column properties
Select the column by left-clicking it to access additional drawing options in the inspector panel on the right side of the window.

1. Details
In the details section, you can find the unique ID of the column object. The ID can't be edited, but you can use it to, for example, access the column object through the API.
2. Position
With the X and Z values, you can change the position of the column in the X and Z axes, respectively. The Base level value controls at which height from the floor the column starts. The Rotation value allows you to fine-tune the rotation of the column.
3. Dimensions
The Height value allows you to control how high the column should be while the Width value determines the width of the column.
4. Default attributes
In the default attributes section, you can change the column from a rectangle to a square and back. You can also assign a custom ID to the object if necessary.
5. Materials
In the materials section, you can select various preset materials from the dropdown menus and assign them to the top and the sides of the column.