Import a floor plan
Open the floor plan model in the Archilogic editor for which you want to replace the reference floor plan.
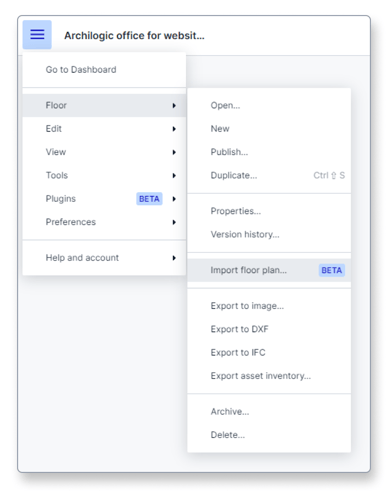
Then, left-click the main menu button in the top left corner of the window and select Floor > Import floor plan.
Importing a new floor plan in the editor will replace the old one.
A new modal shows up, allowing you to select a floor plan. Left-click the blue “Choose a file” button in the middle of the modal and select a floor plan file from your computer. Alternatively, you can also drop a floor plan file into the stroked area of the modal.
You can upload either a JPG or a PNG file.
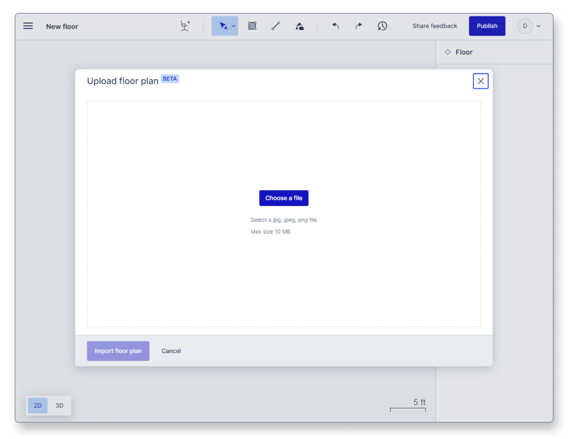
Click the blue “Import floor plan” button in the lower-left corner of the modal once you’ve selected the floor plan you wish to import.
The new floor plan will be imported into the scene and will replace the old one.
Scale the floor plan
Before you can use the newly imported floor plan, you need to make sure that the scale is correct.
There are two different approaches that you can take.
Use a measurement on the floor plan
If there is a measurement of a wall on the floor plan or something similar, you can simply use that to scale it.
Left-click the floor plan to select it.
Once selected, you can set up the correct scale of the floor plan so that it is in sync with real-world dimensions.
Look for a measurement (preferably a relatively long one) on the floor plan.
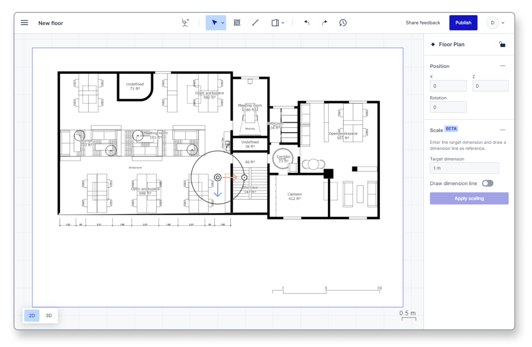
In this example, we use the 10m measurement in the lower right corner of the floor plan.
Type in the length of the measurement into the Target dimension field in the inspector panel on the right.
Then switch on the Draw dimension line toggle and zoom closer to the target measurement.
Left-click the beginning of the measurement and then double-left-click the end of the measurement on the floor plan.
Click the blue “Apply scaling” button once you’re done.

The scaling of the imported floor plan is now in sync with real-world dimensions, and you can move it beneath the already existing model by using the X and Z positions in the inspector panel.
Use the existing model as a measurement reference
If the newly imported floor plan does not have any measurements or if you’re unsure if the measurements are in sync with the existing floor plan model, you can also use the existing drawing as a reference.
To do so, you have to first activate the measurement tool and measure a wall of the model, preferably a long one, as it will result in higher accuracy.
Once you know the length of the wall, left-click the floor plan to select it.
Type in the length of the wall into the Target dimension field in the inspector panel on the right.
Then switch on the Draw dimension line toggle and zoom closer to the same wall, but this time on the floor plan.
Left-click one end of the wall on the floor plan and then move the mouse cursor to the other end of the wall and double-left-click to stop the measurement.
Click the blue “Apply scaling” button once you’re done.
The scaling of the imported floor plan is now in sync with the dimensions of the existing model.
You can now move the floor plan beneath the already existing model by using the red and blue arrows.