Before you can really make use of the many features that Archilogic provides, you first need to get your floor plan into your Archilogic Dashboard. Follow these steps to digitize your floor plan.
Create an order
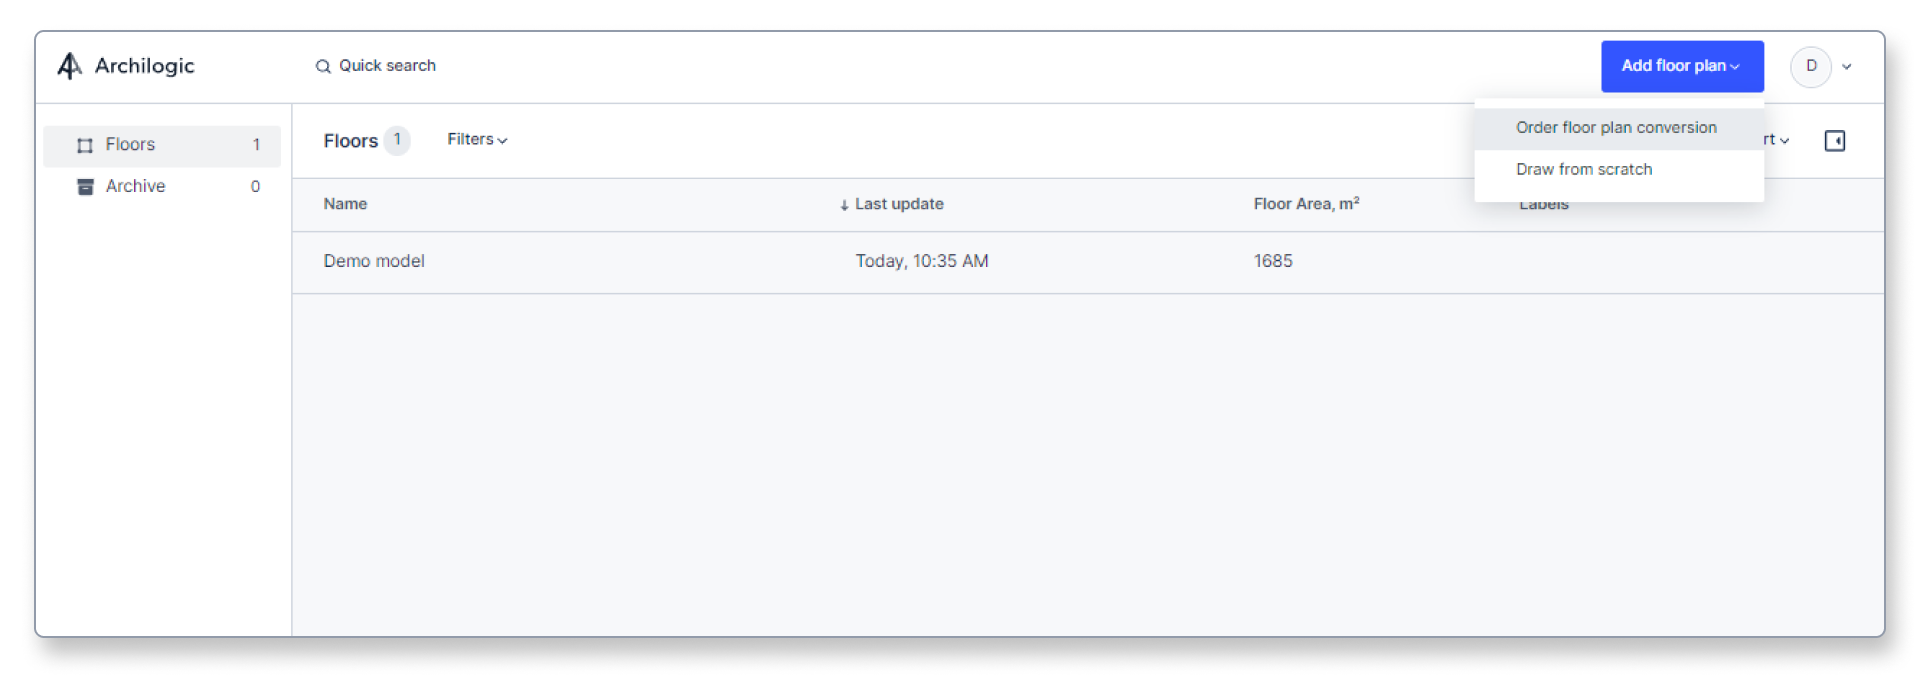
- In your Archilogic Dashboard, left-click the blue Add floor plan button in the upper right corner of the website to open the dropdown menu and select Order floor plan conversion.
- This will open the order form (depending on your subscription plan, you might not see the payment method section).

- Next, assign the floor plan to a building. If it is a new buiding that doesn't exist in your Archilogic account yet you can open the drop-down menu to create a new one. Then enter the location details of the space you’re ordering, such as address and floor number.
- Then, upload a floor plan by clicking into the Upload floor plan field to open the file selection dialog box, or drag and drop your file into the upload field instead.
You can drop JPG, PNG, PDF, DXF, or DWG files into the box. If you’re unsure if your floor plan meets our requirements, you can check this article. - Once you’ve uploaded the floor plan, give your order a name. This is how your floor plan model will be called in the dashboard once it has been converted.
- Then click the Done button to confirm the data you’ve entered.
- If you want to order an additional conversion, you can click the Add another order button and repeat the process described above.
- Finally, click the blue Process and complete order button on the right side.
- Provide your billing information (depending on your subscription plan, you might not see this page) and click the Pay button.

- We will immediately begin processing your floor plan and converting it into a digital Archilogic floor plan model.
- You will be notified via email once your floor plan model is ready (within two business days).
- If you wish to check the current status of your order, you can do so by following this guide.