Differences between components and groups
At first glance, components and asset groups seem similar, but they serve vastly different purposes.
Groups allow you to group several assets, such as tables and chairs, etc. together and move them around or rotate them around a common origin. Each group is its own thing that you can adjust freely without affecting anything else that is not part of it.
Components are also arrangements of several assets. But they act quite differently.
In the same way that assets (for example, a chair) in an Archilogic floor plan are instances of the same product, component instances within an Archilogic floor plan are tied to a source component.
If you create a component once, you can reuse its instances as many times as you wish in the same or in different floor plans. The benefit of a component is that you can adjust the source component and see your changes reflected wherever you have used the instances of said component.
This means that you could, for example, replace the chair within the source component, and wherever you used the instance of this component, you would see the new chair where the old one used to be.
Create components
There are two ways to create components:
Create a component from a group
To create a component from an existing group, you have to first left-click the group to select it.
Once selected, click the grey Convert to component button in the inspector panel on the right side of the window.

Create a component from a selection
To create a component from several ungrouped assets, you have to first select them by left-clicking them one by one while pressing and holding the Shift key on your keyboard.
Once you've selected 2 or more assets, click the grey Convert to component button in the inspector panel on the right side of the window.

Name your component
Regardless of which method you choose, a new menu will open upon clicking the Create component button. This menu allows you to set the name of the component. By default, there is already a name proposal in the field. You can also select a Subcategory value for the new component (for example: Workstation).
Left-click the blue Create button to complete this action.
If you're creating components for Microsoft Places, select Workstation in the Subcategory dropdown menu.

Edit components
To edit a component, you have to double-click it.
This will open the component editing menu. In here, you can rearrange or replace assets.
In the inspector panel on the right, you can also change the name or the subcategory of the component.
Once you're happy with your changes, you can press the blue Update button to save them and exit the component editing menu.
If you wish to exit the component editing menu without saving, you can simply press the grey Cancel button.

Proper setup of a workstation component
To ensure your workstation component has the correct rotation, please follow these rules:
- The chair asset is pointing upwards
- The table asset is pointing downwards
- Both assets are centered
This is important if you need to map Microsoft Places IDs to component instances, as your workstations won't have the correct rotation in Microsoft Places otherwise.


Reuse components
Whenever you create a new component, it gets added to the component registry of your Archilogic account. This means that you or your colleagues can reuse instances of the same component in other floor plans.
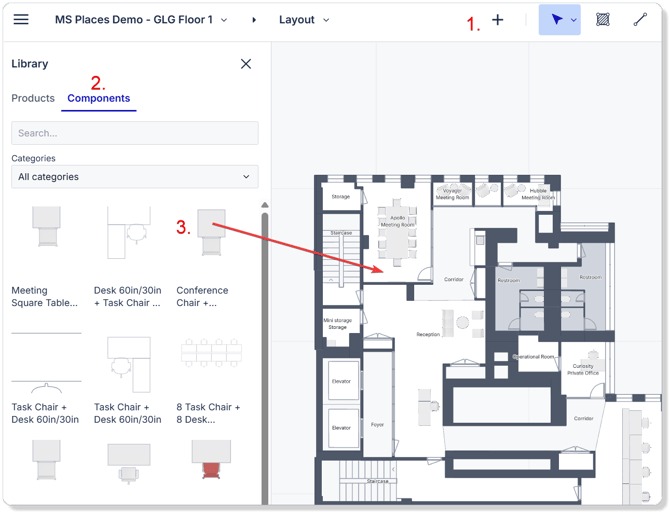
You can find your components in a separate tab within the assets menu.
First, left-click the plus button in the toolbar. Then left-click the component tab.
Afterwards, you can left-click and drag an instance of your component into the editor canvas and move it to the position where you need it.
Update component definitions in a floor plan
If you change or update a component, the change will be shown immediately in the floor plan you're currently working on.
However, if you open a different floor plan that contains instances of the component you updated, you will see a notification in the lower-right corner of your browser window informing you that there is a component definition mismatch.
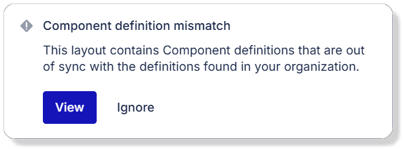
You can either click ignore to keep the version of the component you currently have in your floor plan, or you can click the blue View button for more details.
If you clicked the View button, a new menu pops up showing you which components are out of sync and how many instances of said component you have in your floor plan.
You can now again click ignore to keep the version you currently have in your floor plan or click the blue Accept changes button to sync the component instances in your floor plan with the newer component definition stored in your Archilogic account.
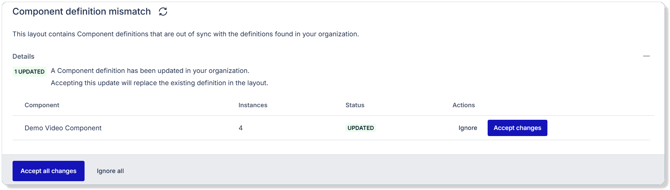
This will then update all the component instances you have in your floor plan with the updated version of it.
Edit the metadata of a component
To edit the metadata of a component, such as the name or the subcategory, you'll have to go to your Archilogic Dashboard.
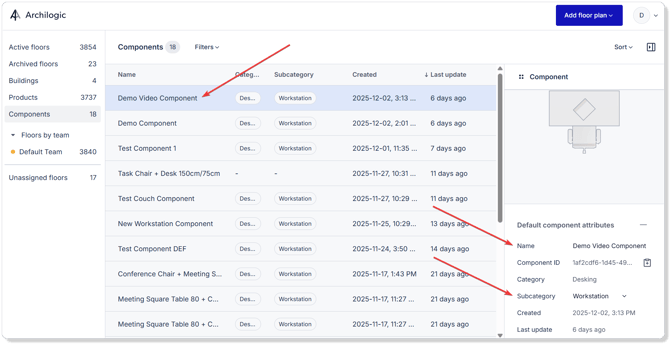
In the Dashboard, left-click the Components tab on the left side of the window to open the Components overview that shows you all the components that were created by you or your colleagues.
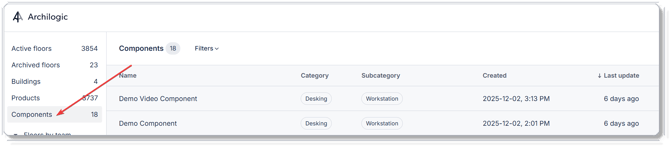
Left-click one of the entries in the list to select it.
You can then find additional information in the inspector panel on the right side of the window.
Left-click the respective field in the inspector panel to either change the name or the subcategory of the component.
Delete a component
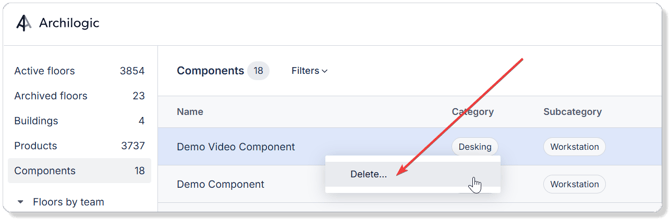
To delete a component, you have to right-click the one you wish to delete in the dashboard overview and select delete.
After deleting a component, it will no longer be available to select from the Components menu in the Editor.
However, instances of the deleted component that were placed into floor plans earlier will not disappear from the floor plans. You can still select them, and if you edit them, a new component will be created in your component registry.