Create a custom attribute
This article shows you how to create a custom attribute on the dashboard
To create custom attributes, you require admin rights.
Custom attributes allow you to assign additional values to resource types such as Asset, Space, and Floor that are specifically tailored to your needs.
You can, for example, create a custom attribute called “Department” for the resource type Space. Once the custom attribute has been set up, it will be available for all Spaces in your Archilogic dashboard. You can then select a space within a floor and assign a value such as “IT” to the previously created attribute while assigning the value “Marketing” to the same attribute of a different space, etc.
Open your Organization settings to create a new custom attribute.
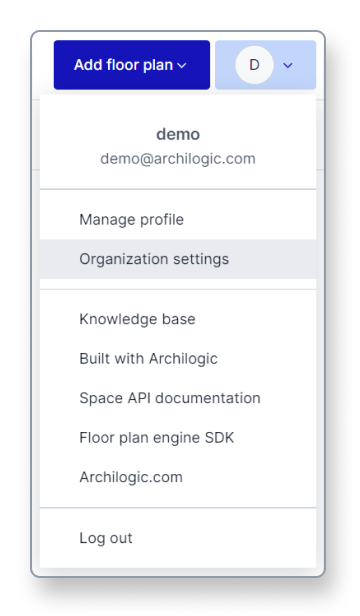
To do so, click the account button in the window's top-right corner and select Organization settings from the drop-down menu.

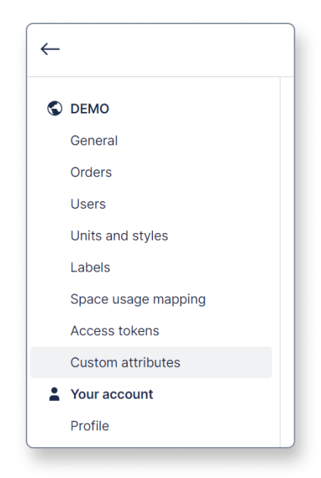
Then select Custom attributes in the menu on the left side of the window.

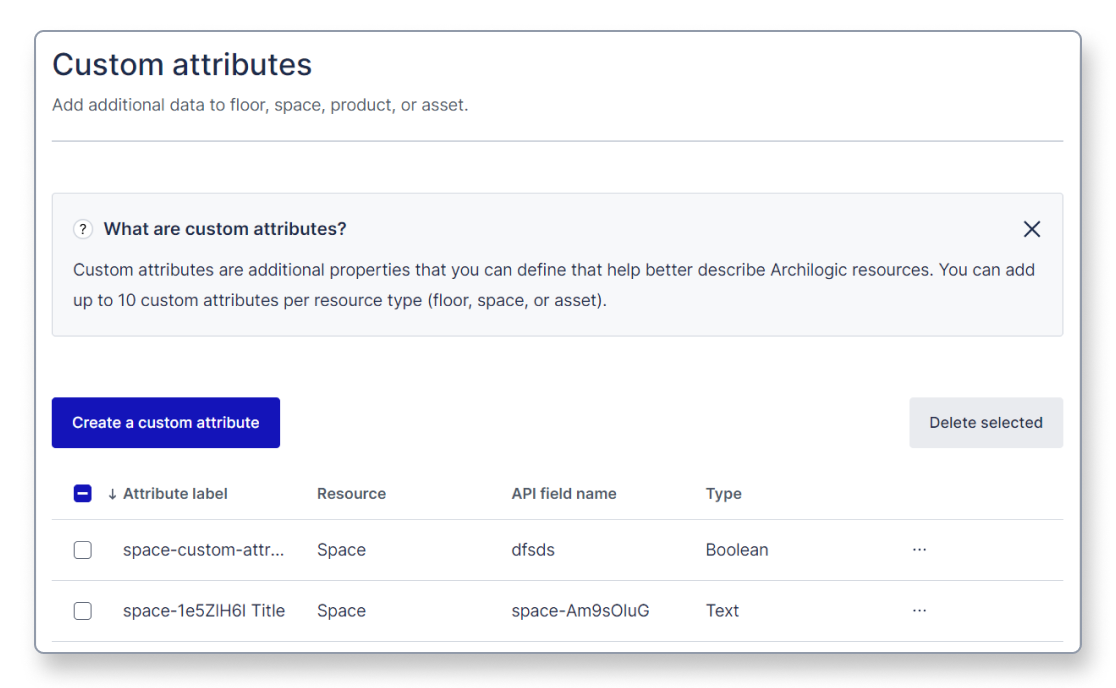
The custom attributes menu will open showing you all previously created custom attributes.
Left-click the blue “Create a custom attribute” button to add a new entry to the list.

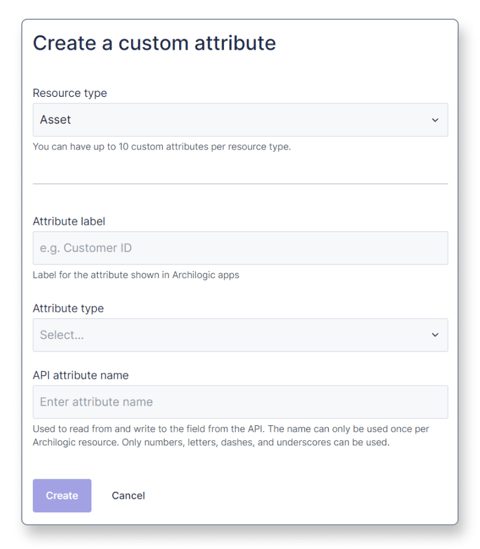
After clicking the “Create a custom attribute” button you’ll be forwarded to the custom attribute creation form.
You can only create up to 10 custom attributes per resource type (floor, space, or asset).
Resource type
The dropdown menu on the top allows you to select the resource type for which you create the custom attribute. You can choose between:
- Floor → This will allow you to assign a custom attribute to an entire floor
- Space → This will allow you to assign a custom attribute to a specific space within a floor
- Asset → This will allow you to assign a custom attribute to a specific asset (product instance) within a floor
- Product → This will allow you to assign a custom attribute to a product if your Archilogic organization has its own products
Attribute label
Next, you have to give your custom attribute a label. You will be able to identify your attribute by this label in Archilogic apps.
Attribute type
The attribute type drop-down menu allows you to choose between 5 different types:
- Boolean (true or false)
- Text (can also contain special characters and numbers)
- Select (you can create various different options that can be selected)
- Number (can only contain numbers)
- Integer (can only contain whole numbers)
API attribute name
Finally, you have to give your custom attribute a unique name with which you can access it through the API. The name can only contain numbers, letters, dashes, and underscores.
Be advised that the Resource type, Attribute type, and API attribute name can't be changed once they've been set.

Click the blue “Create” button once you’re done, and you’ve successfully created a custom attribute.
The newly created custom attribute will now show up in the custom attributes list, and you can start assigning values to it.
