To change the name or address of your floor plan model in your Archilogic account you must first log into your Archilogic dashboard. Once logged in, find the model you wish to edit and select it by left-clicking it.
Rename a model
Click the button with the three vertical dots in the inspector panel on the right side of the window or right-click the model and select Rename…
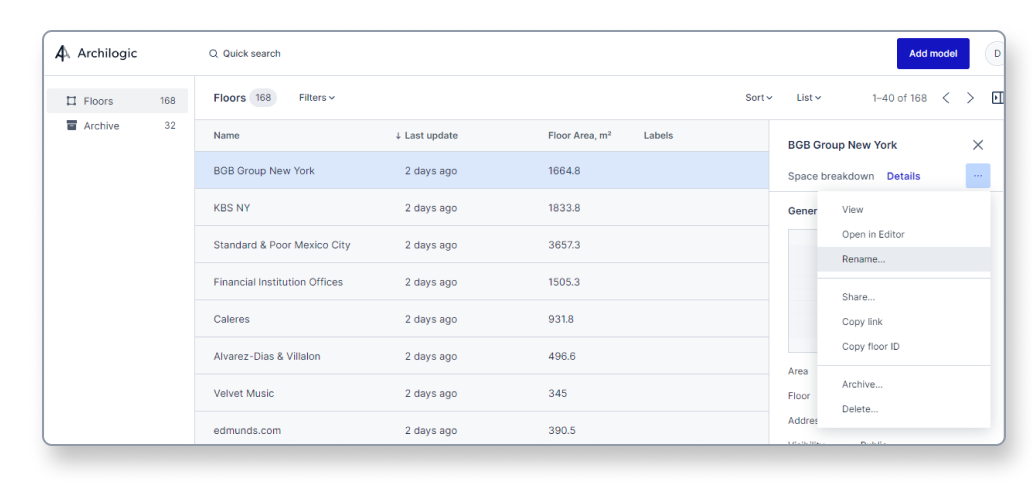
Alternatively, you can also right-click the respective line item in the list and select Rename… in the context menu.

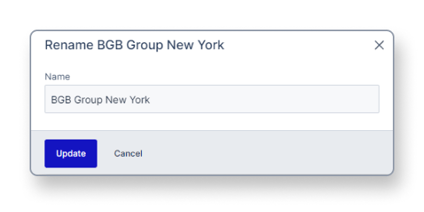
A pop-up will appear, regardless of which method you chose, allowing you to adjust the name of the model. Click the blue Update button to confirm your changes or click the Cancel button to reject them and return to the dashboard.
Adjust other metadata of a model
To adjust other metadata points you have to check out the inspector panel on the right side of the window.
Make sure that you see the Details tab of the selected building model before proceeding.
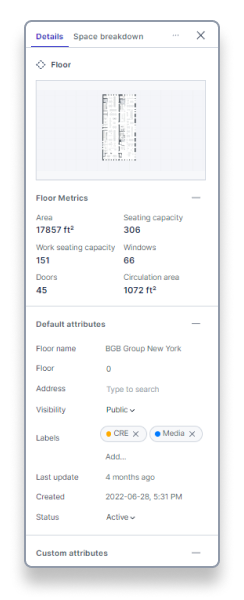
The Floor Metrics section shows you some key data about your floor. These values are automatically generated and can’t be changed manually:
- Area - Area shows the overall square area of a model.
- Seating capacity - This value shows you the total number of seats on your floor.
- Work seating capacity - This value shows you the total number of workplaces on your floor (workplaces that have a desk and a task chair)
- Windows - This value shows the overall number of windows on your floor
- Doors - This value shows the overall number of doors on your floor
- Circulation area - This value shows how much space is used for circulation
The Default attributes section in the inspector panel allows you to change or update the following values:
- Floor name - This value shows you the name of the floor. Usually, it shows the name that the person ordering the floor plan conversion picked, but it can be changed at any time using the steps shown above.
- Floor - The floor number that the model represents. Left-click the number next to Floor to change the value. Simply type in another number and press the Enter key on your keyboard to confirm.
- Address - The building address of the model. Left-click the Add… button to open a pop-up. Then type in a google maps compatible address and confirm to change the address.
- Visibility - This controls whether or not your floor plan model is publicly visible. When visibility is set to "public", you can share the link to the floor plan model and visitors will be able to access and view it without having an Archilogic account. When set to "private", only team members of your Archilogic account will be able to access and view the floor plan model.
- Labels - Assign labels to your floor plan model as shown here to organize your model and make it easier to find them in the future.
- Last update - This value can’t be changed and shows you when any data point of this model was last changed.
- Created - This value can’t be changed and shows you when the model was originally created.
- Status - The status shows you if the model is active or archived. Open the dropdown menu to change it as described here.
The Custom attributes section allows you to assign values to custom attributes that you previously created.