This article shows you how to draw and configure walls in the Editor.
A wall is a structural element used to divide or enclose, and, in building construction, to form the periphery of a room or a building.
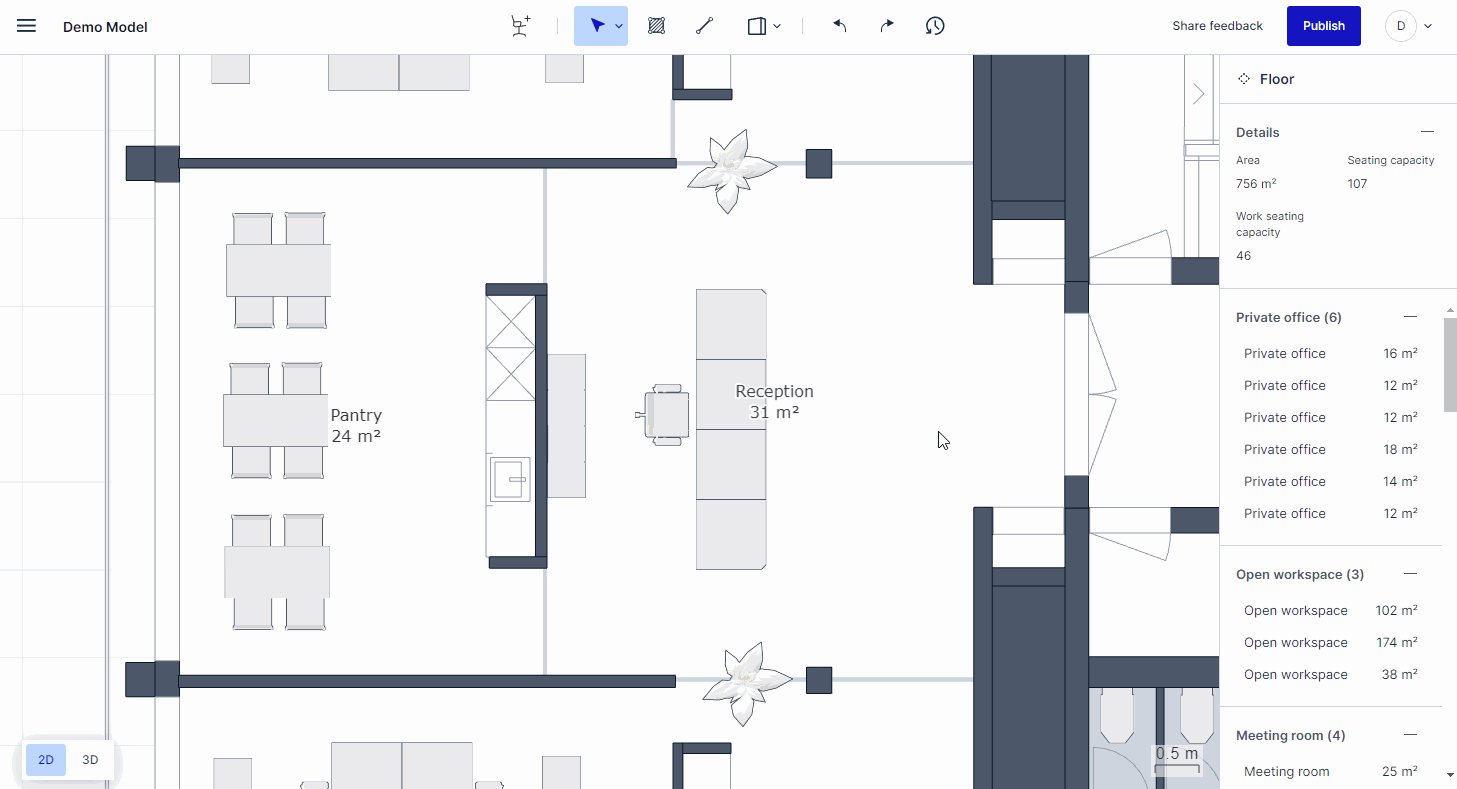
In an Archilogic model, spaces are bound by walls and/or space dividers.
To draw or configure a wall in the Editor, you must be in the structural editing mode. Learn how to activate structural editing mode.
Drawing a wall
To draw a new wall, open the drawing drop-down menu by left-clicking the drawing icon in the menu bar on the top and selecting the wall drawing tool. The selected drawing tool will replace the icon of the drawing menu while also showing you which tool is currently active.
You can also type the keyboard shortcut WA on Mac or Windows to activate the wall tool.
With the wall tool activated, navigate to the canvas, left-click where you want to start drawing a wall, move your mouse cursor and then left-click again where you want the wall to end.
When snapping the end of your wall to another already existing wall you can continue drawing new unconnected walls. If you don’t snap to an already existing wall you automatically continue to draw connected walls until you snap to an already existing wall.
At any given time, you can exit the wall drawing mode by pressing the Esc key on your keyboard.
Learn more about how to split a wall in two, connect/disconnect two walls, and add windows or doors.
Creating a space with connected walls
You can create an enclosed space by connecting the walls. This space is auto-generated with a floor and a ceiling which you can further configure. Once you’ve created a space you can assign a usage to it.
Configuring the wall properties

1. Position
The X position controls the side-to-side movement across the canvas.
The Z position controls the front-to-back movement across the canvas.
The Base level controls the elevation of where the bottom of the wall sits.
The Rotation controls the angle of the wall.
2. Dimensions
The Height controls how high the wall is.
The Thickness controls how thick the wall is.
The Length controls how long the wall is.
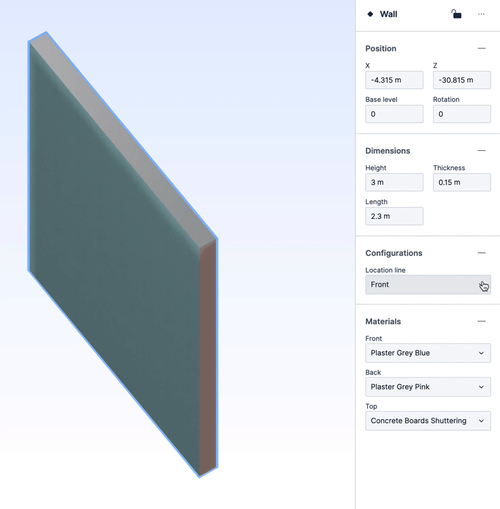
3. Configurations
The location line (Front, center, or back) controls how the wall is drawn and how the material wraps around the end of the wall.
4. Materials
Choose the material for the front, back, and top of the wall from a collection of standard materials in the Archilogic material library.
Changes are autosaved in the Editor but don't forget to publish your model when you are ready to make the changes public.